Meetings
Tracking meetings and meeting attendance with ChamberForge is very easy. This page walks you through how to create and manage meetings. Members can view the meeting details and only Group Organizer or Group Manager can create/edit meetings. Meeting information will be publicly visible to guests unless the group's visibility is set to private.
Create a Meeting
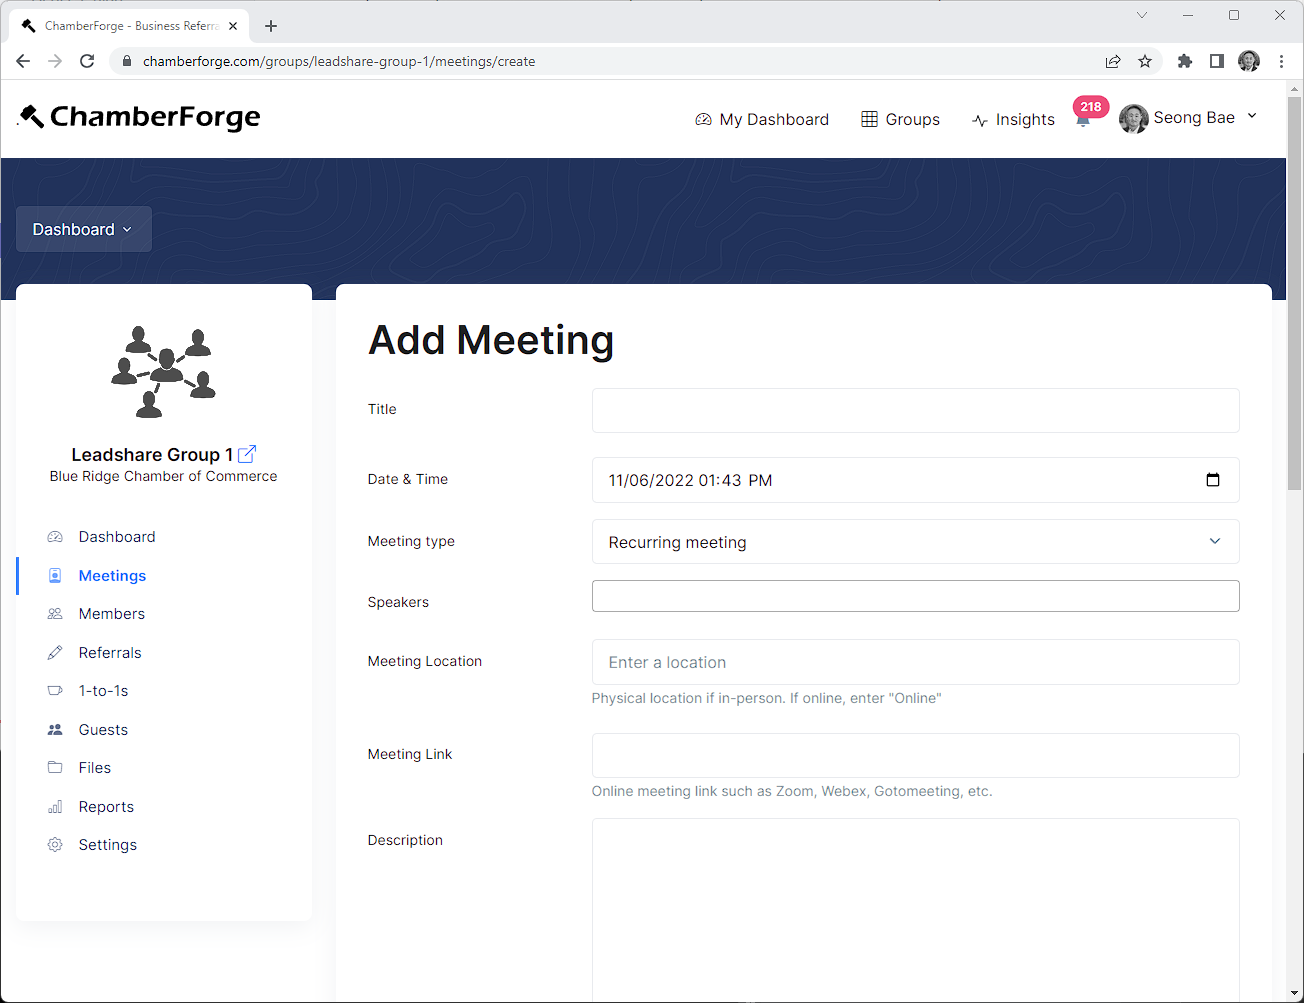
You can create a meeting by going to Meetings from left navigation menu and clicking on Add New. You can create a meeting after a meeting has taken place or create for upcoming meetings.
- Title: title of the meeting
- Date & Time: date and time of the meeting
- Meeting type: choose if this is a recurring meeting or one-time event such as happy hour. it is set to recurring by default.
- Speakers: you can track multiple speakers per meeting
- Meeting Location: location of the meeting
- Meeting Link: online meeting URL (Zoom, Webex, etc)
- Description: meeting description. This data will be publicly visible to outside the group such as on the public meeting RSVP page.
- Meeting Notes: any internal notes about the meeting. This will remain private and be visible only to members.
- Image: image for the meeting. This will be visible on the meeting's public page.
{warning} If you choose one-time event for the Meeting Type, the meeting will not be counted when generating the Attendance report. One-time events are generally considered optional rather than recurring weekly/bi-weekly meetings that are mandatory. Therefore, if you see that the numbers are off on the Attendance report, please make sure that the correct meeting type is selected for the meetings.
You can browse to a meeting's public page by clicking on the meeting, Menu, and then Go to Public Page.
Update Attendance
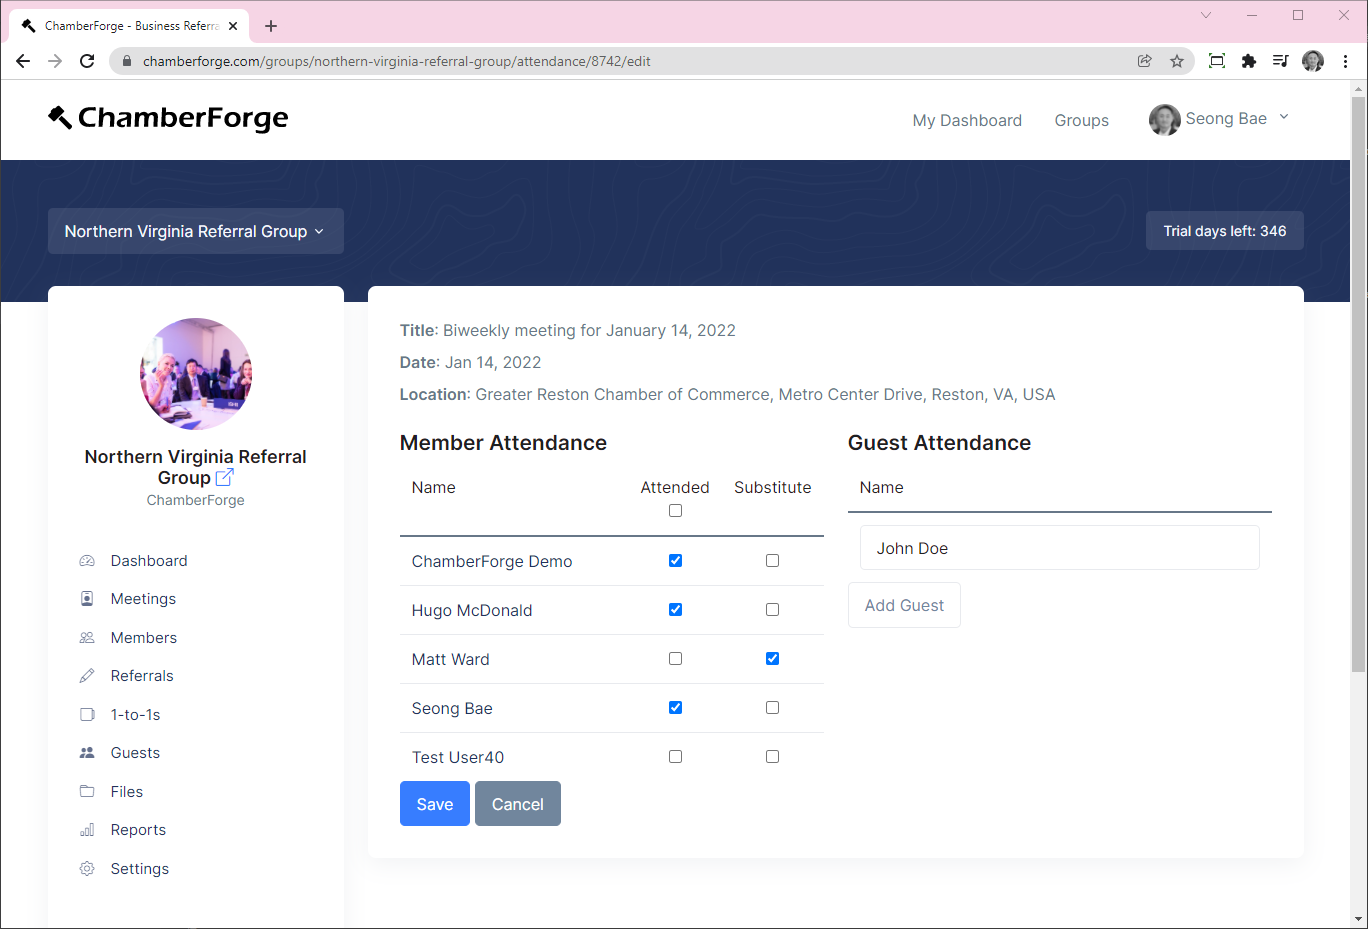
After a meeting has been created, you can edit/delete the meeting and also track meeting attendance. To track meeting attendance, click on the Menu button and then the Update Attendance link. You will see members of the group with checkbox next to their name. Simply check the checkbox to denote the member's meeting attendance. To update guest attendance, simply find the guest name from the dropdown. A guest entry must exist in the system before the guest's attendance can be tracked.
If you have a large group, checking each checkbox can be a tedious process. You can check all by checking the topmost checkbox.
Denote Substitute
If a member cannot make to a meeting and sends a subsitute in his or her place, you can denote that a substitute attended the meeting. Simply click on the checkbox under the Substitute column for members who had substitutes at the meeting. Substitute information will be displayed accordingly throughout the meeting data and reports. Substitute does not count towards absence when calculating attendance percentage.
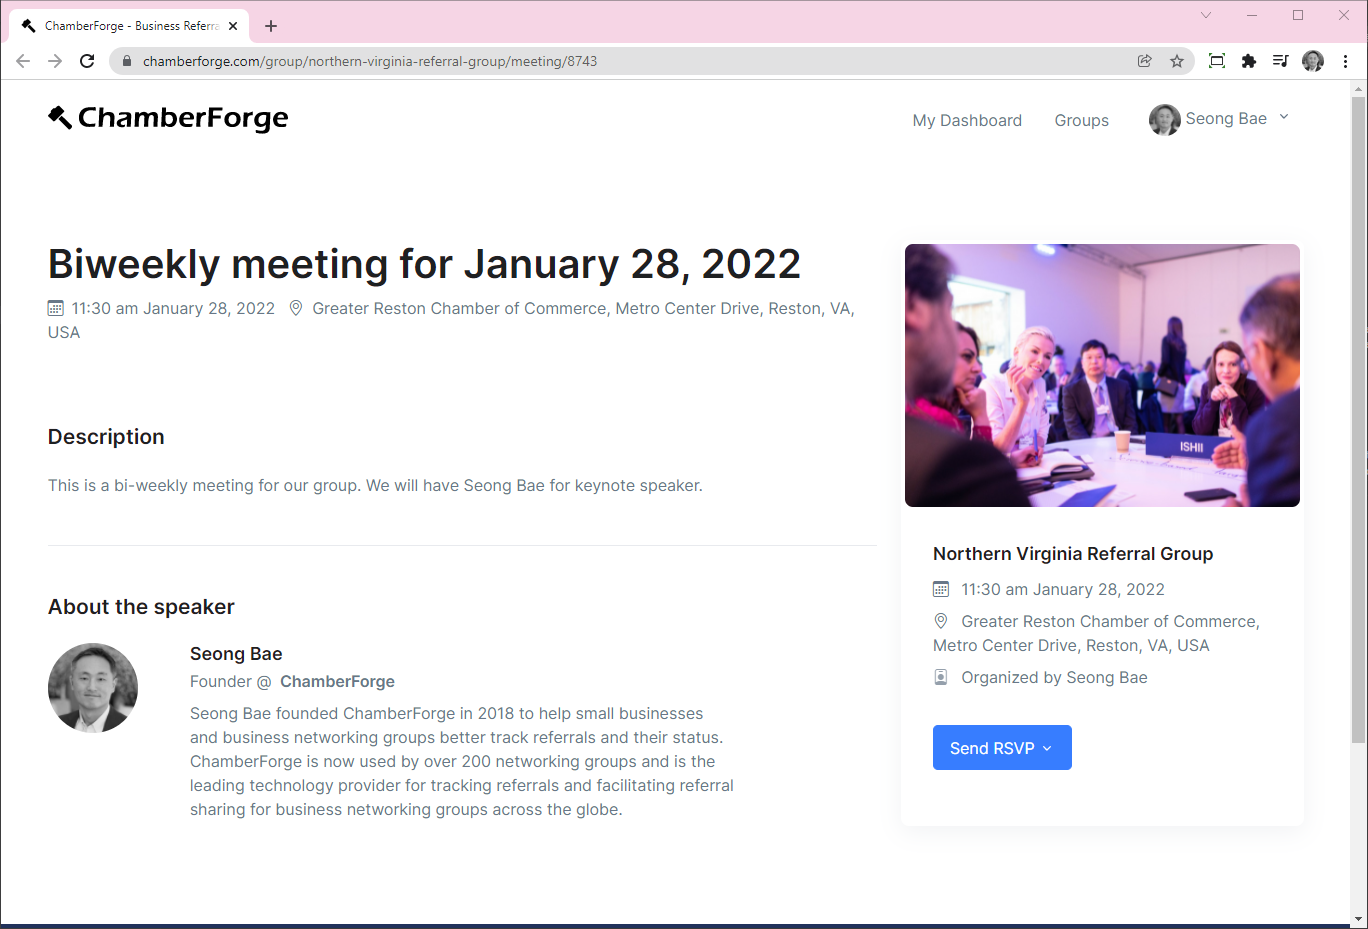
Meeting Public Page
Every meeting entry has its respective public page where members and guests can submit RSVP. You can get to the meeting's public page by going into the meeting details screen and then clicking on Go to Public Page link. You can also get to it by going to your group's public page and then browsing to the meeting page.